How to Install Surfshark VPN on Your Device?
Are you looking for a reliable VPN service that offers privacy and security? Surfshark VPN could be the answer to your needs. In this article, we will guide you step-by-step on how to install Surfshark VPN on your device.

Why Surfshark VPN?
Before we proceed with the installation process, let's briefly discuss why Surfshark VPN is an excellent choice. Surfshark VPN is a virtual private network that offers advanced security and privacy features. Here are some of the reasons why you should consider using Surfshark VPN:
Strong encryption: Surfshark VPN uses AES-256-GCM encryption, which is one of the strongest encryption methods available.
- No-logs policy: Surfshark VPN has a strict no-logs policy, which means that your online activities are not recorded.
- Unlimited devices: You can use Surfshark VPN on an unlimited number of devices simultaneously.
- CleanWeb feature: Surfshark VPN's CleanWeb feature blocks ads, trackers, and malware.
- Affordable: Surfshark VPN is one of the most affordable VPN services on the market.
Now that you know why Surfshark VPN is an excellent choice, let's proceed with the installation process.
Step-by-Step Guide to Install Surfshark VPN
Step 1: Sign up for Surfshark VPN
The first step is to sign up for Surfshark VPN. You can visit their website and choose a plan that suits your needs. Once you have selected the plan, provide your email address and payment details to complete the signup process.
Step 2: Download and install Surfshark VPN
After signing up, you will receive an email with a link to download the Surfshark VPN app. Click on the link to download the app and install it on your device.
Step 3: Launch Surfshark VPN
Once the installation is complete, launch the Surfshark VPN app on your device. You will be prompted to enter your login details. Enter the email address and password you used to sign up for Surfshark VPN.
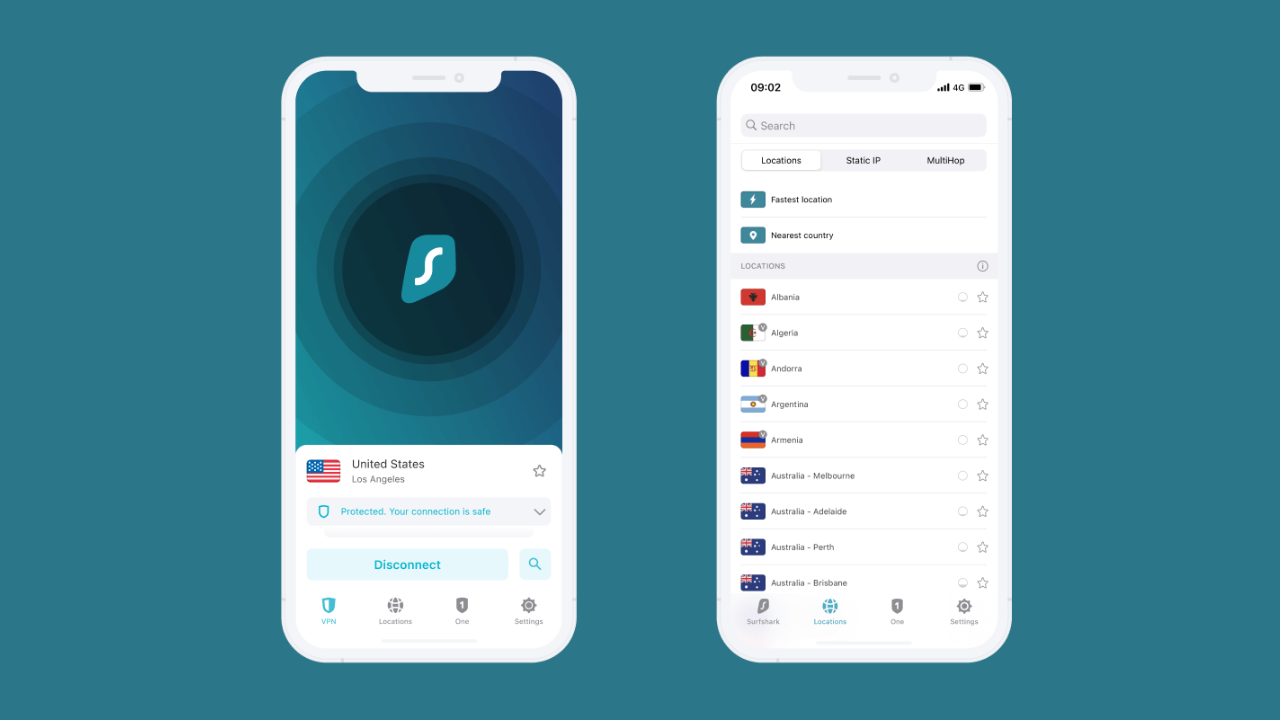
Step 4: Choose a server location
After logging in, you will be presented with a list of server locations. Choose a server location that suits your needs. If you want to access content from a specific country, choose a server location in that country.
Step 5: Connect to the server
Once you have selected the server location, click on the connect button to connect to the server. The Surfshark VPN app will establish a secure connection with the server, and your internet traffic will be encrypted.
Step 6: Verify your connection
To verify that your connection is secure, you can visit a website that shows your IP address. If your IP address is different from your actual location, it means that your connection is secure.
Conclusion
In conclusion, Surfshark VPN is an excellent choice for anyone looking for a reliable VPN service that offers privacy and security. The installation process is straightforward, and you can be up and running in a matter of minutes.
FAQs
- Is Surfshark VPN compatible with all devices?
- Yes, Surfshark VPN is compatible with Windows, Mac, iOS, Android, and Linux.
- Can I use Surfshark VPN on multiple devices?
- Yes, you can use Surfshark VPN on an unlimited number of devices simultaneously.
- Does Surfshark VPN offer a money-back guarantee?
- Yes, Surfshark VPN offers a 30-day money-back guarantee.
- Can Surfshark VPN unblock streaming services?
- Yes, Surfshark VPN can unblock popular streaming services like Netflix, Hulu, and Amazon Prime.